- Early replacement prevents major damage: Fixing cracked, curled, or missing shingles early helps you avoid costly repairs from leaks, rot, or structural issues.
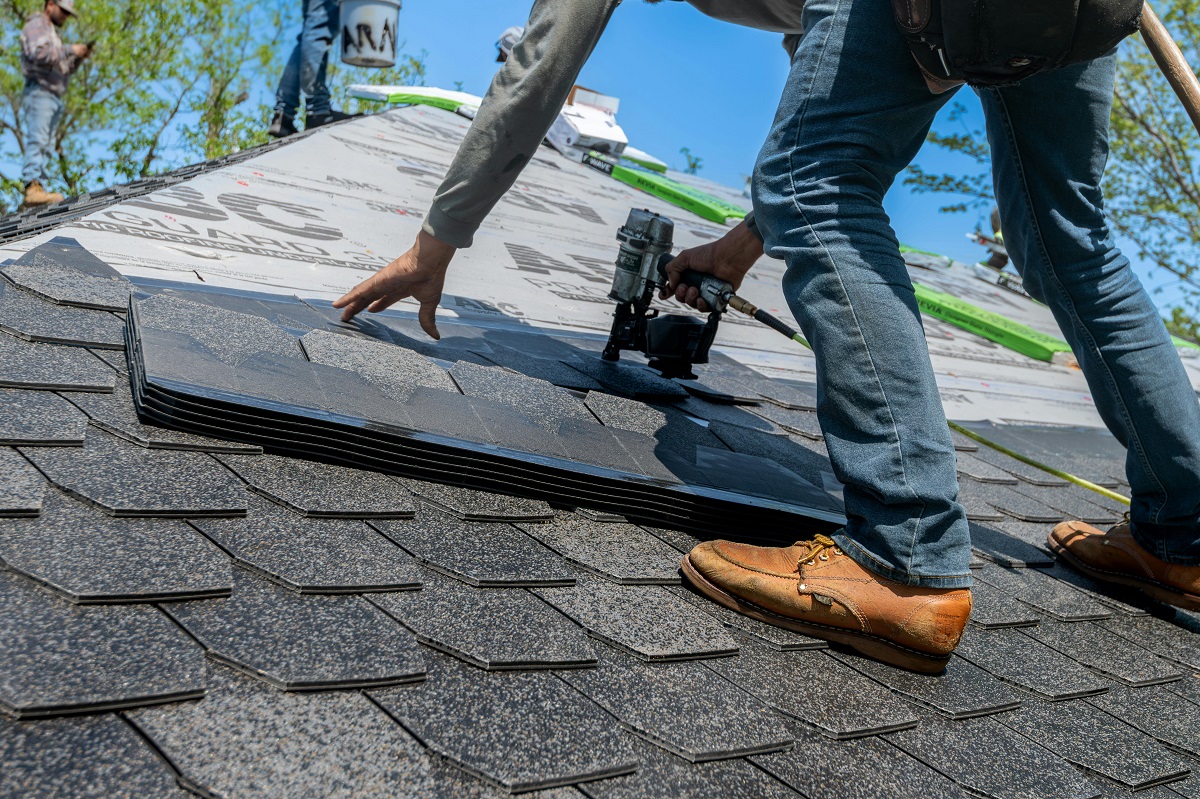
- DIY is doable—but safety first: Homeowners can replace a few shingles themselves if they’re comfortable with heights, use proper safety gear, and work only in good weather.
- Use the right materials: Always match replacement shingles to your existing roof type, color, and manufacturer for the best fit and appearance.
- Follow the correct removal and nailing process: Gently pry out damaged shingles, use fresh nails in proper locations, and ensure each shingle lies flat to prevent leaks.
- Seal for durability: Applying roofing cement under the new shingle helps secure it against wind uplift and water intrusion until the factory adhesive bonds.
- Inspect and maintain regularly: After repairs, check your roof after storms and clean gutters to extend your shingles’ lifespan.
- Know when to call a professional: If the roof is steep, damage is widespread, or you spot signs of rot or deck weakness, it’s safer and more effective to hire a roofer.
If your roof has a few damaged shingles, you don’t always need to call a contractor right away. Learning how to replace roof shingles yourself can save you money and extend the life of your roof. Whether you’re dealing with cracked, curled, or missing shingles, replacing them is a manageable DIY project with the right tools and a bit of patience.
In this guide, you’ll learn everything you need to know—from spotting damage and gathering tools to safely replacing shingles like a pro.
Why Replace Roof Shingles?
Your roof’s shingles act as the first line of defense against wind, rain, snow, and sun. Over time, they can deteriorate due to weather exposure, age, or improper installation.
Replacing damaged shingles early prevents more serious issues such as leaks, wood rot, or structural damage.
Common Reasons Shingles Need Replacement
- Storm damage: Strong winds or hail can crack or tear shingles.
- Age: Asphalt shingles typically last 15–25 years.
- Moss or algae growth: This can lift shingles and let moisture in.
- Improper installation: Poor sealing or nailing can cause early failure.
- Normal wear and tear: UV rays and temperature changes degrade asphalt over time.
Signs Your Shingles Need Attention
Before climbing up, inspect from the ground or use binoculars to spot:
- Missing shingles or patches.
- Curled, buckled, or cracked shingles.
- Granule loss (bald spots on shingles).
- Dark streaks or discoloration.
- Water stains or leaks in your attic.
If you see these warning signs, replacing roof shingles is a smart preventative move before leaks spread.
Can You Replace Roof Shingles Yourself?
Yes, it’s possible to replace roof shingles on your own—especially if you’re dealing with a small patch of damage. However, roof work can be risky and physically demanding. If your roof is steep, old, or if you’re uncomfortable working at height, hiring a professional roofer is the safer route.
If you decide to do it yourself, preparation and safety are everything. Here’s what to gather and what to know before you begin.
Tools and Materials You’ll Need
Make sure you have the right tools and matching materials for a proper repair:
- Replacement shingles from the same manufacturer as your existing roof. This ensures the correct color, texture, and—most importantly—width. A slightly wider shingle can cause seams to pucker or crack once installed.
- Roofing nails, preferably 1¼-inch stainless steel nails with a ring shank for stronger grip.
- Roofing hammer or nail gun.
- Flat pry bar or thin, rigid roofing bar with a notch for prying out nails.
- Utility knife for trimming shingles.
- Roofing cement or flashing sealant (a thick, non-sagging type).
- Ladder and safety harness.
- Work gloves and non-slip shoes.
Safety First: Before You Climb
Working on a roof carries real risks. Never rush through the job—your safety matters more than any repair.
Follow these key precautions:
- Only work on dry, mild-weather days. Avoid heat, rain, or wind.
- Use a safety harness and secure your ladder on stable ground.
- Keep tools organized and within reach to avoid overreaching.
- Wear rubber-soled shoes for traction.
- Have a partner or spotter nearby for emergencies.
If at any point you feel uneasy, stop and get help from a roofing professional. A minor fall can cause major injuries.
Step 1: Assess the Damage
Before pulling up any shingles, take a careful look at the entire area. You need to know whether the problem is isolated or part of a larger issue.
If you notice soft or spongy areas underfoot, water might have penetrated the roof deck. That requires more than just shingle replacement—it may need professional repair.
How to Inspect Effectively
- Start from the edges and look for lifted or missing shingles.
- Check around vents, chimneys, and valleys, where leaks often begin.
- Look for rust or wear on flashing—these are common leak points.
- Inside your attic, check rafters and insulation for water stains or mold.
If the damage is limited to a few shingles, you can move forward with a localized repair.
Step 2: Remove the Damaged Shingles
Removing a damaged shingle takes patience and a delicate touch. The goal is to get the old piece out without breaking the shingles around it. Here’s how to do it:
- Loosen the adhesive tabs: Slide a flat, rigid pry bar sideways under the shingle above the damaged one. Keep the bar as flat as possible to avoid cracking the brittle shingles. Work gently to separate the adhesive tabs on both the target shingle and the one above it.
- Lift and locate the nails:
Once the tabs are loose, wedge the notched end of your pry bar under the shingle at each nail position. Lift slightly until the nail head rises, then pull it out carefully. - Remove all fasteners:
You’ll typically find eight nails securing one shingle—four in the common bond (the lower overlapping layer) and four more in the head lap (near the top edge, covered by the shingle above).
Remove all eight nails from the damaged shingle and the ones securing the upper layer that overlaps it. - Slide out the damaged shingle:
Once the nails are clear, pull the shingle out horizontally. - Clean the area:
Scrape away leftover sealant or debris. Make sure the surface is flat and clean for the new shingle to lay properly.
Pro Tip: Perform shingle removal on a warm day. The asphalt becomes more flexible and less likely to crack during prying.
Step 3: Prepare the Replacement Shingle
Now that the damaged piece is gone, it’s time to prepare your new shingle for installation. Precision here ensures your repair looks natural and stays watertight.
Cutting and Fitting
- Trim the replacement shingle with a utility knife to match the exact length of the one removed.
- Use a full-height shingle—never cut off the top portion (head lap). Keeping the full piece ensures proper overlap and nailing alignment.
- Slide the new shingle into position so it fits neatly under the row above and aligns with the surrounding pattern.
If you’re replacing several in a row, maintain consistent spacing and pattern alignment for a seamless finish.
Step 4: Nail the New Shingle in Place
The nailing process determines how well your shingle holds up over time. Poor nailing is a common cause of leaks, so precision is key.
Proper Nailing Technique
- Use 1¼-inch stainless steel ring-shank roofing nails.
- Place four nails along the common bond line—this is the overlap area between the visible and hidden portions of the shingle.
- Add four more nails along the head lap, which secures the upper course of shingles.
- Keep each nail at least one inch from the shingle edge.
- Drive nails straight in so the heads sit flush with the surface—neither raised nor overdriven.
To avoid damaging the shingle above:
- Gently tent the upper shingle with your other hand while setting the nail.
- Hammer carefully to prevent cracking.
If possible, use new nail holes rather than reusing old ones for a stronger bond. Once nailed, your new shingle should feel solidly anchored.
Step 5: Seal and Secure the Area
After nailing, sealing ensures your shingle stays put until the factory adhesive fully activates in sunlight and warmth.
How to Seal Properly
- Lift the lower edge of the new shingle slightly.
- Apply four nickel-sized dabs of a high-quality roofing or flashing cement (non-sagging type) about 1½ inches above the bottom edge.
- Press the shingle down firmly into these adhesive spots. This “hand tabbing” step prevents wind uplift before the built-in sealant softens and bonds naturally.
- Smooth away any excess cement with a putty knife.
This small but crucial step adds strength, keeps moisture out, and ensures your repair remains watertight through storms and seasonal changes.
Step 6: Inspect Your Work
Before packing up, take a few minutes to check your craftsmanship. A quick inspection now can prevent future headaches.
Post-Repair Checklist
- Are the new shingles flush with the others—no raised edges or gaps?
- Did you use all required nails (including those securing the upper layer)?
- Are nail heads sealed and hidden from weather exposure?
- Does the color and pattern blend smoothly with the rest of the roof?
- Have you removed all debris and tools from the area?
Finally, step back and inspect from ground level. The repair should blend naturally with your existing roofline. If it does, congratulations—you’ve just completed a professional-quality roof shingle replacement.
Step 7: Allow Time for Adhesion
New shingles take time to settle and bond completely. The heat from sunlight will gradually soften the factory-applied adhesive strips on the underside of the shingles, helping them seal tightly against the ones below.
Tips for Proper Bonding
- Avoid walking on the repaired area for a few warm, sunny days.
- If temperatures are cool, use a heat gun on a low setting to gently warm the seal strips.
- Check the area after the first rain or storm to ensure all edges remain sealed.
Once bonded, the repair should perform just like the original roofing.
How to Replace Roof Shingles After a Storm
Storm damage is one of the most common reasons homeowners need to replace shingles. High winds can lift or tear shingles, while hail can cause cracking. Here’s how to handle storm-specific damage.
1. Inspect After the Storm
Once it’s safe, inspect your roof for:
- Missing shingles.
- Exposed nails or underlayment.
- Dents or cracks caused by hail.
- Debris or branches that might have damaged shingles.
2. Temporary Fixes
If rain is still in the forecast, apply roofing cement or a tarp over exposed areas to prevent water intrusion.
3. Replace Damaged Shingles
Follow the same step-by-step process outlined earlier. Always document the damage for insurance claims before beginning repairs.
How Much Does It Cost to Replace Roof Shingles?
Cost depends on the type of shingles, roof pitch, and the extent of damage. Here’s a breakdown to help estimate your expenses.
DIY Costs
- Asphalt shingles: $30–$40 per bundle (covers about 33 sq. ft.).
- Roofing nails and cement: $20–$40.
- Safety gear and tools (if needed): $50–$100.
A small repair area might only cost $100–$200 if you already own basic tools.
Professional Costs
Hiring a roofer for partial replacement typically costs:
- $300–$600 for small areas.
- $5,000–$12,000 for a full roof replacement depending on size and materials.
DIY can save you hundreds, but ensure your safety and workmanship before taking it on.
What If You Have Multiple Damaged Areas?
If your roof has widespread shingle damage or the shingles are nearing their lifespan, replacing individual pieces may not be enough. In that case, consider re-roofing or a full replacement.
Indicators You Might Need a New Roof
- More than 25–30% of shingles are damaged.
- Frequent leaks or visible sagging.
- Shingles are brittle, curling, or losing granules.
- The roof is over 20 years old.
While patch repairs are great for minor issues, they won’t fix aging or systemic roofing problems.
How to Match Replacement Shingles
Matching replacement shingles ensures your roof looks consistent and professional. If you don’t have leftover shingles from your original installation, bring a sample to your local home improvement store.
Matching Tips
- Check the manufacturer: Most shingles have a code printed on the back.
- Match color and texture: Shingles fade over time, so consider natural aging when selecting replacements.
- Buy extra bundles: You’ll have spares for future repairs and consistent color matching.
A mismatched roof might still perform well—but a visually seamless repair maintains curb appeal and resale value.
When to Call a Professional Roofer
Even if you’re confident with DIY, some situations require professional help.
Hire a Roofer If:
- The roof pitch is steep or slippery.
- Damage extends beyond a few shingles.
- There’s evidence of underlying water or deck damage.
- You’re unsure about local building codes or permits.
Professionals have specialized tools and experience to repair or replace shingles safely and efficiently.
How Long Does a Shingle Replacement Last?
A properly installed replacement shingle should last as long as the rest of your roof—typically 15 to 25 years for asphalt. However, longevity depends on:
- Climate and exposure to sunlight.
- Quality of materials used.
- Proper ventilation in the attic.
- Regular roof maintenance.
Extending the Life of Your Roof
To keep your roof in good shape:
- Clean gutters twice a year.
- Remove debris and moss promptly.
- Inspect after major storms.
- Address leaks immediately.
A little routine maintenance goes a long way in preventing future shingle damage.
FAQs About Replacing Roof Shingles
Can I replace just one shingle?
Yes. If only one or two shingles are missing or cracked, you can replace them individually as long as surrounding shingles are in good shape.
Do I need to remove old shingles first?
For small patches, you only remove the damaged pieces. However, if doing a full re-roof, all old shingles must come off for proper installation.
What’s the best time of year to replace shingles?
Spring and fall are ideal since temperatures are moderate, and shingles seal more effectively.
How long does it take to replace shingles?
A small repair usually takes 1–3 hours, depending on your experience and roof condition.
Will replacing shingles stop a roof leak?
If the leak was caused by damaged or missing shingles, yes. However, if water damage extends deeper, additional repairs may be needed.
Common Mistakes to Avoid When Replacing Shingles
Learning from common DIY errors helps ensure your repair lasts.
Watch Out For:
- Improper nail placement: Too high or low can cause leaks.
- Skipping sealant: Unsealed shingles can lift during high winds.
- Working in extreme temperatures: Cold makes shingles brittle; heat makes them soft and sticky.
- Using mismatched shingles: Creates uneven layering and poor water flow.
Avoiding these mistakes keeps your repair durable and professional-looking.
Final Thoughts: Keep Your Roof in Top Shape
Replacing roof shingles might sound intimidating, but with the right tools, materials, and know-how, it’s a project many homeowners can handle successfully.
By learning how to replace roof shingles properly, you not only save money but also protect your home from water damage and improve its overall durability. Whether it’s a few missing shingles or a small patch job, taking the time to fix it right now can prevent much bigger problems down the line.
Keep this guide handy, and remember: even small repairs play a big role in keeping your roof—and your home—strong for years to come.