- Minor roof damage doesn’t always require replacement. Small cracks, curled edges, or loose shingles can often be repaired with roofing cement or adhesive instead of replacing the entire shingle.
- Repairing shingles saves time and money. Basic tools like a hammer, putty knife, and sealant can handle most small issues for under $100, compared to thousands for a full roof replacement.
- Routine inspection is essential. Catching problems early—such as lifted corners, missing granules, or nail holes—prevents leaks and extends the life of your roof.
- Proper surface preparation ensures lasting repairs. Cleaning dirt, debris, and moss before applying cement or sealant helps the materials bond effectively.
- Some damage calls for full replacement. If more than 25–30% of shingles are failing, the roof is over 20 years old, or leaks keep returning, replacement is a better long-term solution.
- Safety comes first in roof repairs. Always work on dry days, wear non-slip shoes, and use a harness or have someone assist when working on sloped or elevated surfaces.
- Regular maintenance prevents future issues. Keeping gutters clear, trimming branches, and checking flashing annually helps avoid costly repairs and water damage.
Roof shingles take the brunt of sun, rain, wind, and snow year after year. Over time, they can crack, curl, or lose granules—but that doesn’t always mean you have to replace them. In many cases, you can repair roof shingles without replacing them entirely. This saves money, time, and effort, while still keeping your roof watertight and durable.
If your roof isn’t showing widespread damage, knowing how to repair roof shingles without replacing them can extend its lifespan significantly. Let’s explore the tools, materials, and repair methods you can use to fix common shingle issues yourself.
Why Repair Roof Shingles Instead of Replacing Them?
Full roof replacements can cost thousands of dollars, and often they’re not necessary if only a few shingles are damaged. Repairing shingles is a smart move when:
- Only a small section of shingles is affected.
- The roof’s overall structure is still strong.
- Damage is due to weather exposure, not underlying rot or leaks.
By repairing instead of replacing, you can:
- Save money: A few tubes of roofing sealant or cement are far cheaper than a full tear-off.
- Save time: Small repairs can be done in a day without professional help.
- Prevent leaks early: Quick fixes keep moisture from penetrating deeper layers.
If your goal is to extend the life of your roof without committing to a major project, small repairs are the way to go.
Common Problems You Can Fix Without Replacement
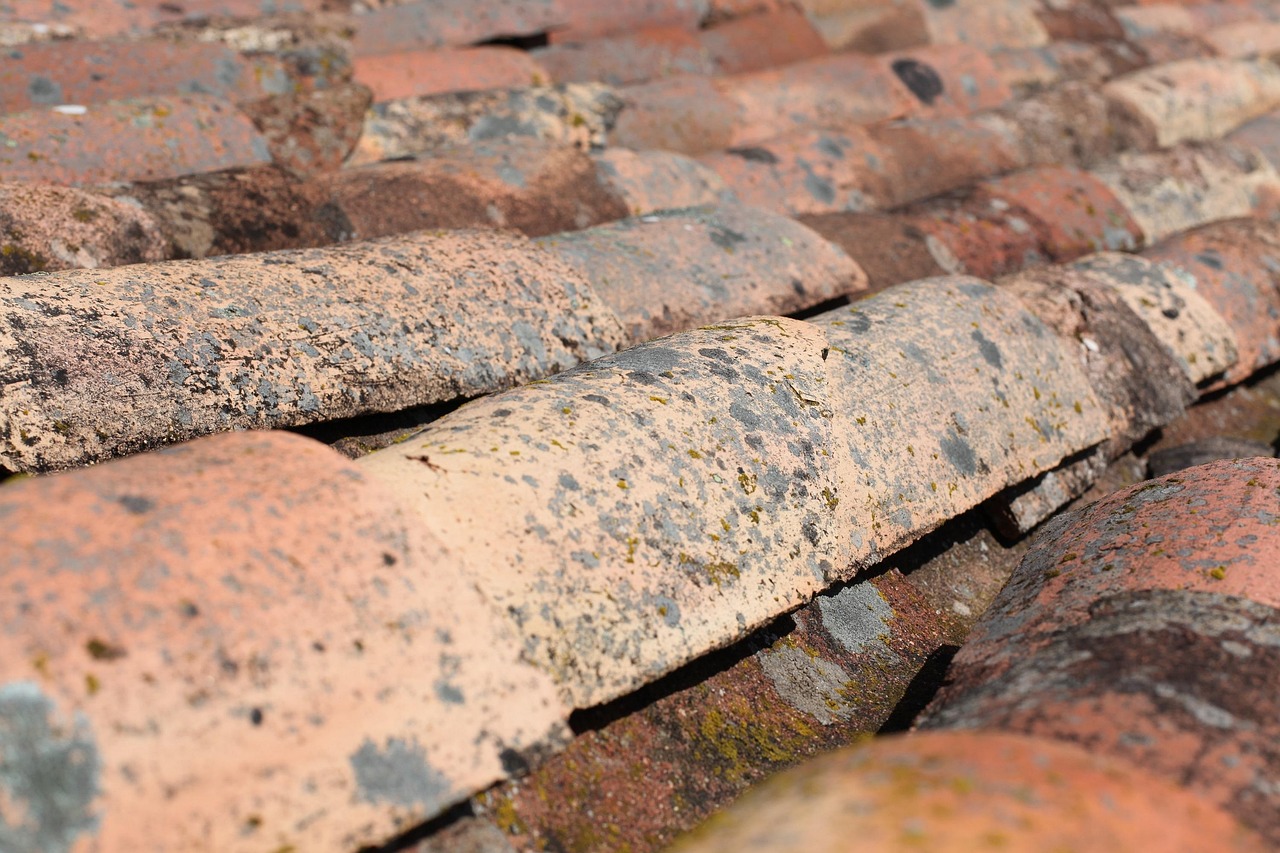
Before diving into repairs, it’s important to know what types of shingle damage you can safely repair. Here are the most common issues that don’t necessarily require new shingles:
1. Cracked or Split Shingles
Cracks often appear from age or wind stress. If the shingle is mostly intact, you can seal the crack using roofing cement or sealant.
2. Curling or Lifting Shingles
Over time, shingles may curl upward or lift due to heat or poor ventilation. These can usually be re-secured with roofing adhesive and nails.
3. Minor Granule Loss
Granules protect shingles from UV rays. If some have worn away, you can repair this using clear roof coating or granule touch-up products.
4. Small Holes or Punctures
Tiny punctures caused by nails, tree branches, or hail can be patched with roofing cement to prevent leaks.
5. Loose or Missing Nails
If shingles flap or shift, it might just be a loose nail issue. Refastening with new roofing nails usually solves the problem.
Understanding the type of damage helps you choose the best repair method.
What Tools and Materials Do You Need?
To repair roof shingles without replacing them, you don’t need specialized contractor tools. Most materials are available at local hardware stores. Here’s what you’ll need:
Tools:
- Utility knife or roofing blade
- Hammer
- Putty knife or caulking gun
- Flat pry bar (for gently lifting shingles)
- Ladder (and roof harness for safety)
- Gloves and safety goggles
Materials:
- Roofing cement or asphalt sealant
- Roofing adhesive
- Roofing nails
- Shingle granules (optional for touch-ups)
- Caulk gun
- Replacement nails or screws for flashing
Having these on hand makes small roof repairs quick and efficient.
How to Repair Roof Shingles Without Replacing Them: Step-by-Step
Now let’s go through the main repair process. Each step focuses on safely sealing or reinforcing damaged shingles to prevent leaks and further wear.
Step 1: Inspect the Roof Carefully
Start by visually inspecting your roof from the ground or with binoculars. Look for:
- Cracked or curled shingles
- Dark or damp patches (signs of moisture)
- Exposed nails or lifted edges
- Missing granules or debris buildup
For a closer look, use a sturdy ladder and walk carefully on the roof. Avoid stepping directly on damaged shingles.
Step 2: Clean the Damaged Area
Before you apply any adhesive or cement, the surface must be clean. Use a brush or cloth to remove:
- Dirt and dust
- Moss or algae buildup
- Loose granules
This helps sealant or adhesive stick properly for long-lasting results.
Step 3: Reattach Loose or Lifted Shingles
If you notice a shingle corner lifting or curling:
- Gently lift the shingle with a putty knife.
- Apply a small amount of roofing cement underneath the lifted edge.
- Press it back down firmly.
- Add a little more cement over the top edge if needed.
- Weigh it down or hold it for a minute to let the adhesive bond.
For extra hold, you can secure the corner with a roofing nail and cover the nail head with cement.
Step 4: Seal Cracked Shingles
If a shingle has a visible crack:
- Use roofing sealant or cement along the entire length of the crack.
- Spread it evenly using a putty knife.
- Press the crack together so the sealant fills in the gap.
- Sprinkle matching shingle granules over the wet sealant for a seamless look.
Once dried, the repaired area will resist moisture and blend in with surrounding shingles.
Step 5: Patch Small Holes or Nail Punctures
Tiny holes can cause leaks if ignored. Here’s how to patch them:
- Clean the hole and surrounding area.
- Apply roofing cement directly over the hole.
- Spread it about an inch beyond the damaged spot.
- Smooth it out with a putty knife.
- Optionally, press shingle granules on top to camouflage the patch.
This simple step can prevent costly water damage beneath the roof.
Step 6: Fix Curling Shingles
When shingles curl at the corners, they can easily catch wind and break off. To fix them:
- Soften the shingle slightly using gentle heat from a hair dryer.
- Lift the corner carefully.
- Apply roofing cement underneath.
- Press down and hold it until it sticks.
- Add a dab of cement on the top edge to secure it.
Avoid using an open flame or torch—excess heat can damage shingles permanently.
Step 7: Check the Flashing and Sealant Lines
Sometimes leaks come from flashing or sealant gaps rather than shingles themselves. Inspect metal flashing around chimneys, vents, and valleys. If the sealant looks cracked or worn:
- Remove the old caulk or cement.
- Reapply a fresh bead of roofing sealant.
- Smooth it for even coverage and watertight protection.
This prevents leaks from seeping through joints and edges.
Step 8: Inspect After Rain
After finishing your repairs, keep an eye on the roof during or after the next rain. Check for:
- Drips in the attic
- Damp insulation or ceiling stains
- Wet spots around repaired areas
If you see no signs of moisture, your repair was successful.
When Should You Avoid DIY Shingle Repair?
While many small issues can be handled on your own, there are times when calling a roofing professional is safer and smarter. Avoid DIY repair if:
- Damage covers a large area of the roof.
- Shingles are brittle or disintegrating from age.
- There are multiple leaks inside the home.
- The underlayment or decking is soft or rotted.
- You’re uncomfortable working on a roof slope.
Professional roofers have the equipment and experience to handle structural problems and large-scale repairs safely.
When to Consider Replacing Roof Shingles
Even if you know how to repair roof shingles without replacing them, some roofs reach a point where patching just isn’t enough. Replacement may be the smarter long-term choice when:
- The roof is over 20 years old. Asphalt shingles typically last 15–30 years, depending on climate and maintenance.
- Widespread damage is visible. If more than 25–30% of shingles are cracked, curled, or missing, repairs won’t hold up for long.
- Leaks persist after multiple repairs. Ongoing moisture problems often signal deeper issues with the underlayment or decking.
- Shingles are brittle or crumbling. Age-related brittleness makes repairs ineffective.
- Energy bills are rising. Poor insulation and ventilation can worsen with old, failing shingles.
If these signs sound familiar, it might be time to move from repairs to a full replacement. Learning how to replace roof shingles can help you understand what’s involved before hiring a professional or tackling it yourself.
How Long Do Repaired Shingles Last?
A well-done repair can last for years if the rest of the roof is in good condition. Typically:
- Small crack or seal repairs: 3–5 years
- Curl or lift reattachment: 5–8 years
- Minor patch jobs: Up to 10 years
Regular roof inspections—especially after storms—can help spot new issues early and extend your roof’s lifespan even longer.
Preventing Future Shingle Damage
Preventive maintenance is the best way to reduce the need for repairs. Follow these simple habits:
- Keep gutters clean: Clogged gutters cause water backup and shingle damage.
- Trim overhanging branches: Prevent debris and impact damage.
- Inspect yearly: Especially before winter or rainy seasons.
- Ensure proper ventilation: Poor attic ventilation can cause shingles to overheat and curl.
- Address small issues immediately: Tiny cracks can quickly grow into leaks if ignored.
These small steps keep your roof in good condition and reduce costly repairs down the road.
Can You Repair Roof Shingles in Cold or Wet Weather?
It’s best to do roof repairs in mild, dry weather. Adhesives and roofing cement may not bond well in cold or wet conditions. If you must work in less-than-ideal weather:
- Use cold-weather roof sealant specifically designed for low temperatures.
- Make sure the roof is dry before applying any cement.
- Allow extra curing time for sealants to set.
Patience and timing are key to durable roof repairs.
Cost of Repairing Roof Shingles Without Replacement
DIY repairs are far cheaper than full roof replacements. Here’s a quick breakdown:
- Roofing cement or sealant: $10–$25 per tube
- Roofing adhesive: $15–$30 per gallon
- Granule touch-up kits: $20–$40
- Replacement nails and tools: $10–$20
Overall, most small DIY shingle repairs cost under $100, while professional patch jobs might cost $200–$400 depending on size and accessibility.
That’s still a fraction of a full roof replacement, which can range from $6,000 to $12,000 or more.
Safety Tips for Roof Repairs
Roof work involves risks, especially on steep or wet surfaces. Always follow these precautions:
- Never work on a wet or icy roof.
- Use a safety harness or rope system.
- Wear non-slip shoes with good traction.
- Keep tools secure to prevent drops.
- Don’t overreach or lean near edges.
- Have someone nearby for assistance.
Safety should always come before convenience.
Quick Fixes vs. Permanent Solutions
Not all repairs are equal. Temporary fixes like applying roofing cement can buy time but may need redoing after a few years. For long-term results:
- Use high-quality roofing materials.
- Reinforce cracked shingles from underneath if possible.
- Check sealing every few seasons.
Knowing the difference between quick and durable solutions helps you maintain your roof properly over time.
In Closing
Learning how to repair roof shingles without replacing them gives homeowners an affordable and practical way to handle roof issues early. Small cracks, curls, and holes can often be fixed using basic materials and careful technique—no need to call a contractor for every minor issue.
However, keep an eye on your roof’s overall health. If repairs become frequent or widespread, a professional inspection might reveal deeper problems like underlayment damage or moisture intrusion.
By combining regular maintenance, timely DIY fixes, and smart prevention, you can extend your roof’s life for many more years—saving thousands in potential replacement costs.